Ruatoria, carving lesson
October 21, 2012
Today, I’m invited by John to learn how to carve in bones. He has been doing this for 25 years as a hobby. He told me that, one day, some people from UK approached him and bought 4 pieces from him and put them in a museum in London :-).
stack option: image
is full width: true
video link:
dialogue repeater: false
caption:
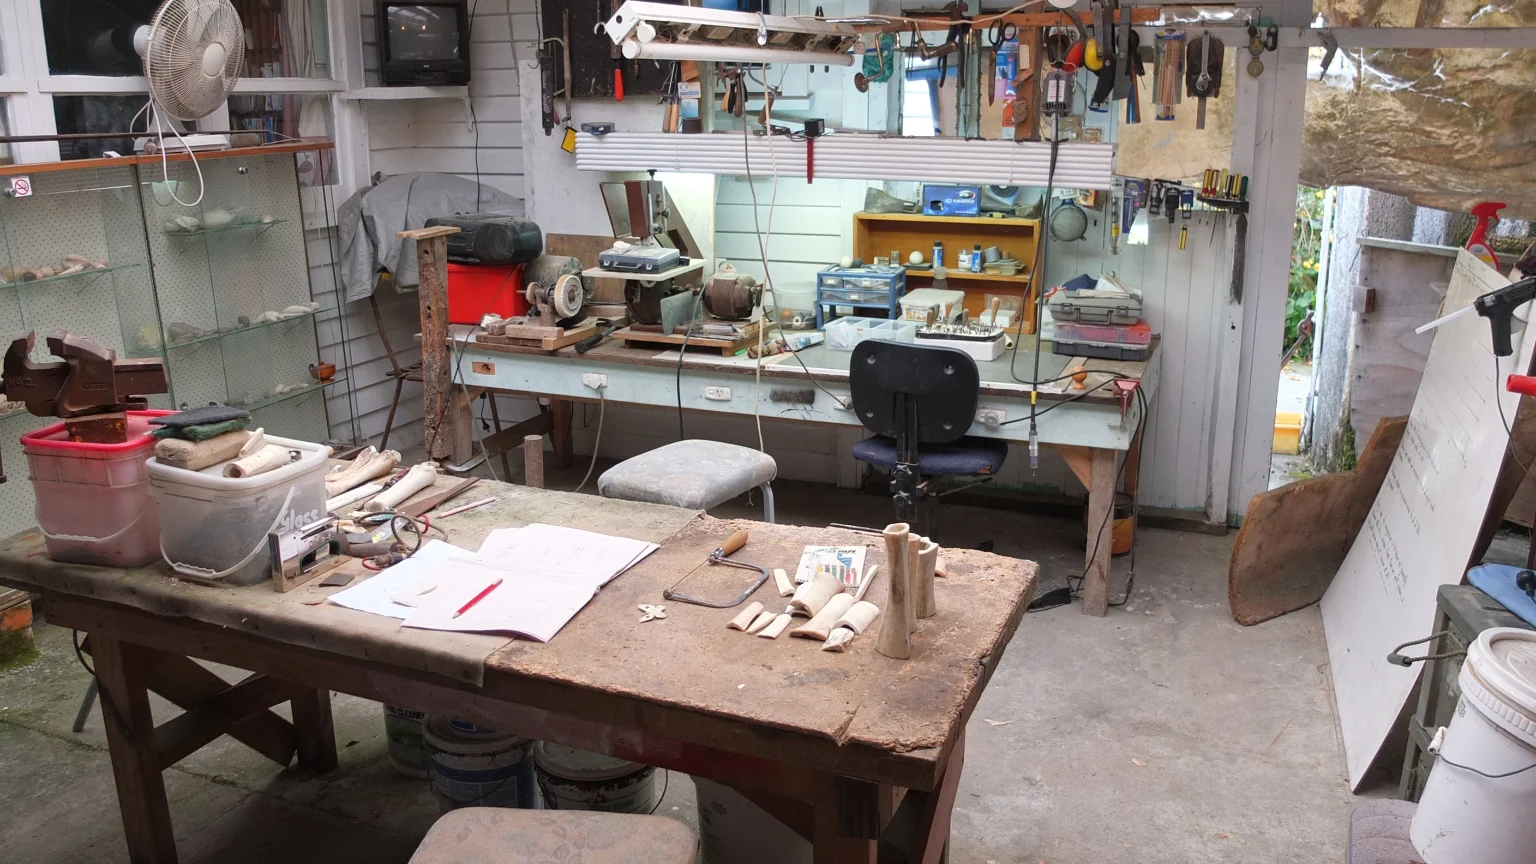
John’s workshop has a lot of tools but he is very well organized if I compare with a certain garage of my grandpa :-) haha.
stack option: image
is full width: false

video link:
dialogue repeater: false
caption:
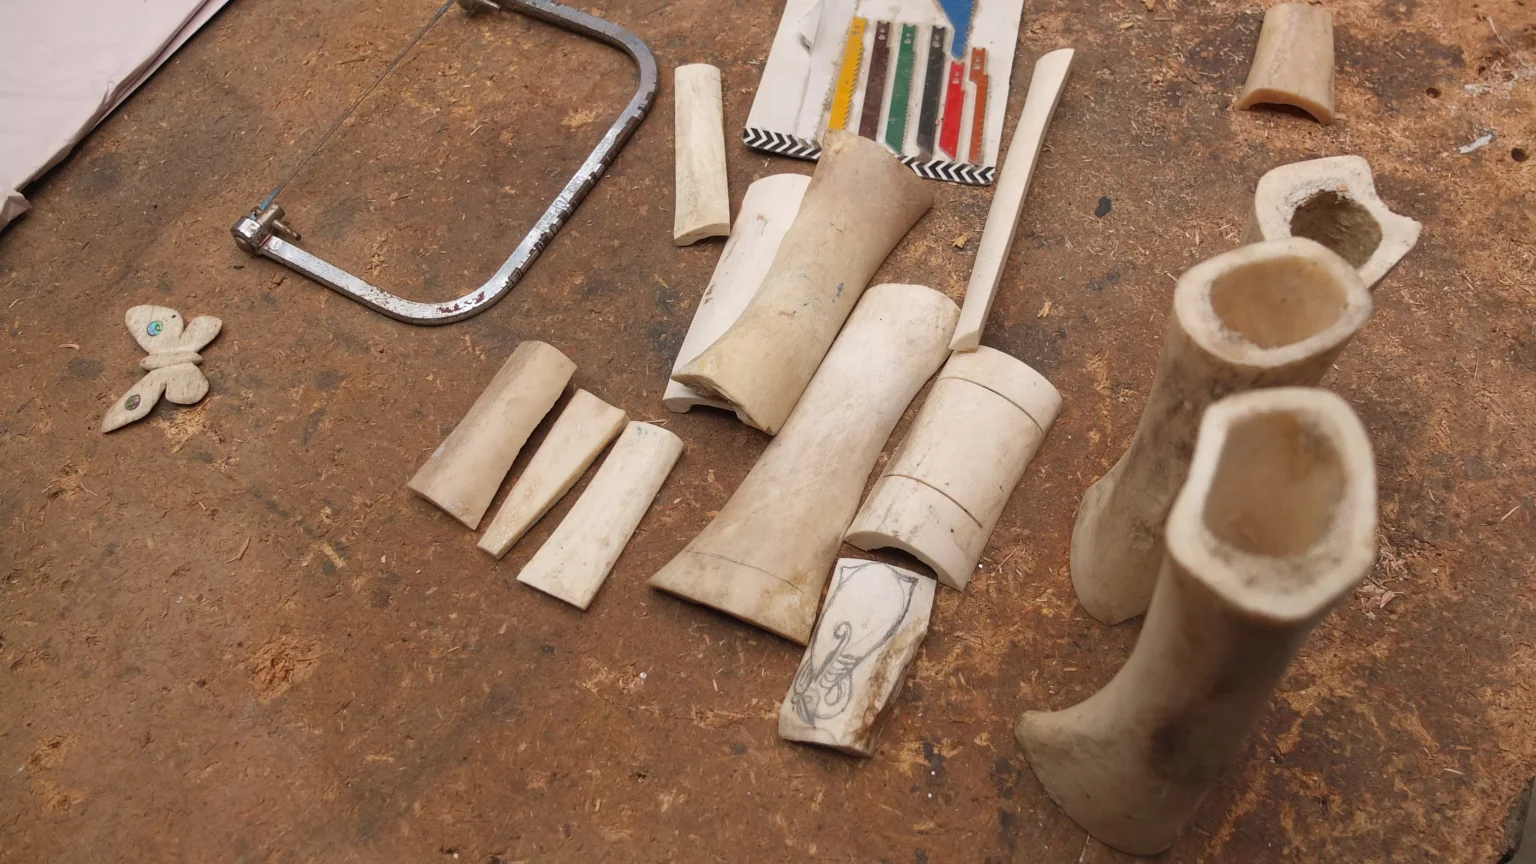
These are all the necessary steps I need to follow to realize any shape. Firstly, John will create one piece to show me the process. Then it will be my turn.
stack option: image
is full width: false
video link:
dialogue repeater: false
caption:
The butterfly on the left hand side was his first creation. Now, it’s my turn.
Step 01: I have to choose the right size for the thing I want to make and clean it.
stack option: image
is full width: false
video link:
dialogue repeater: false
caption:
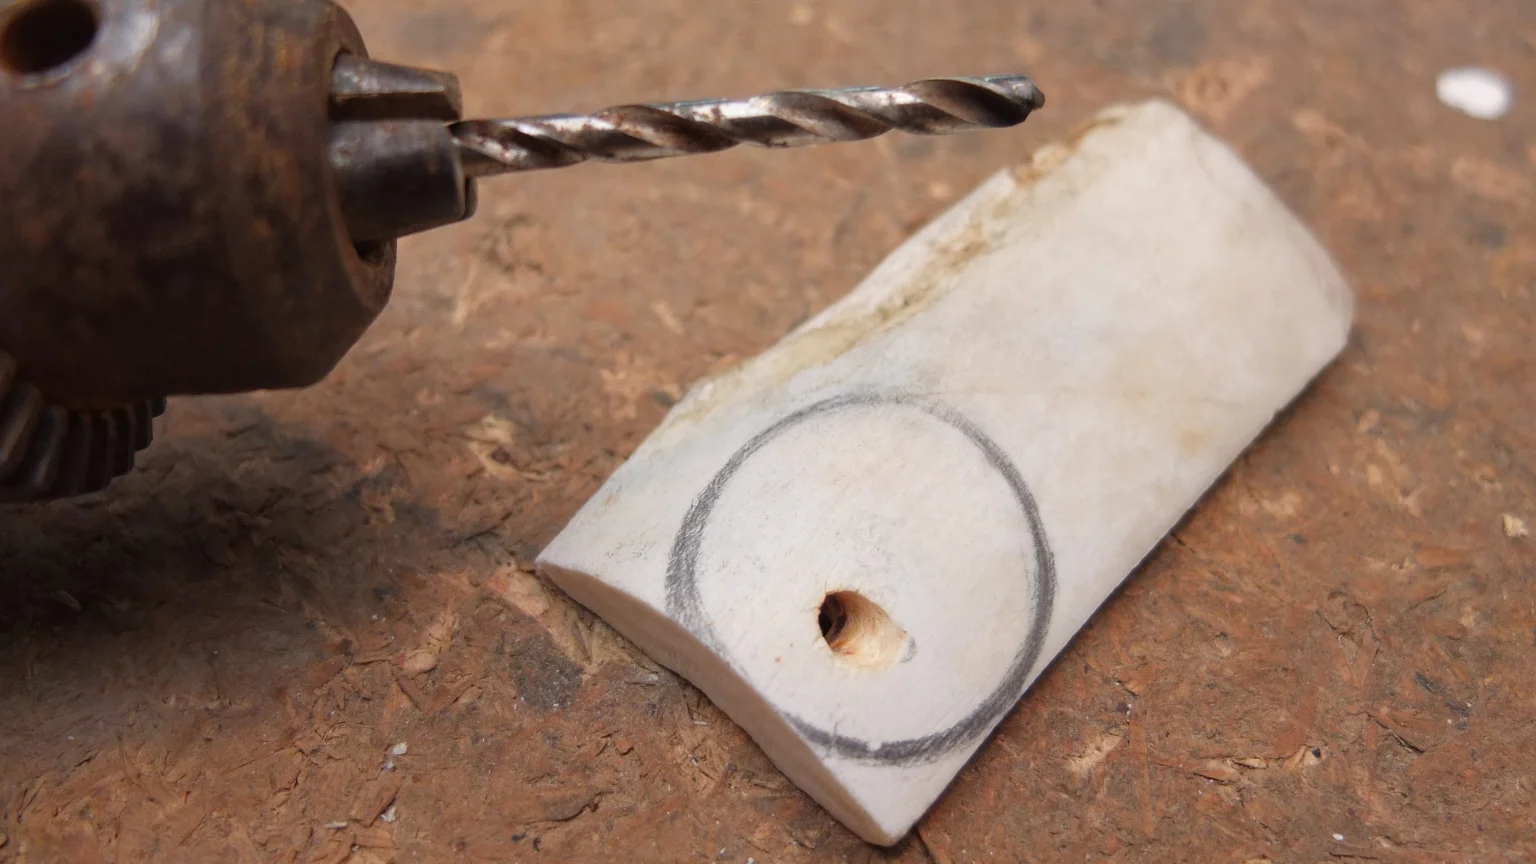
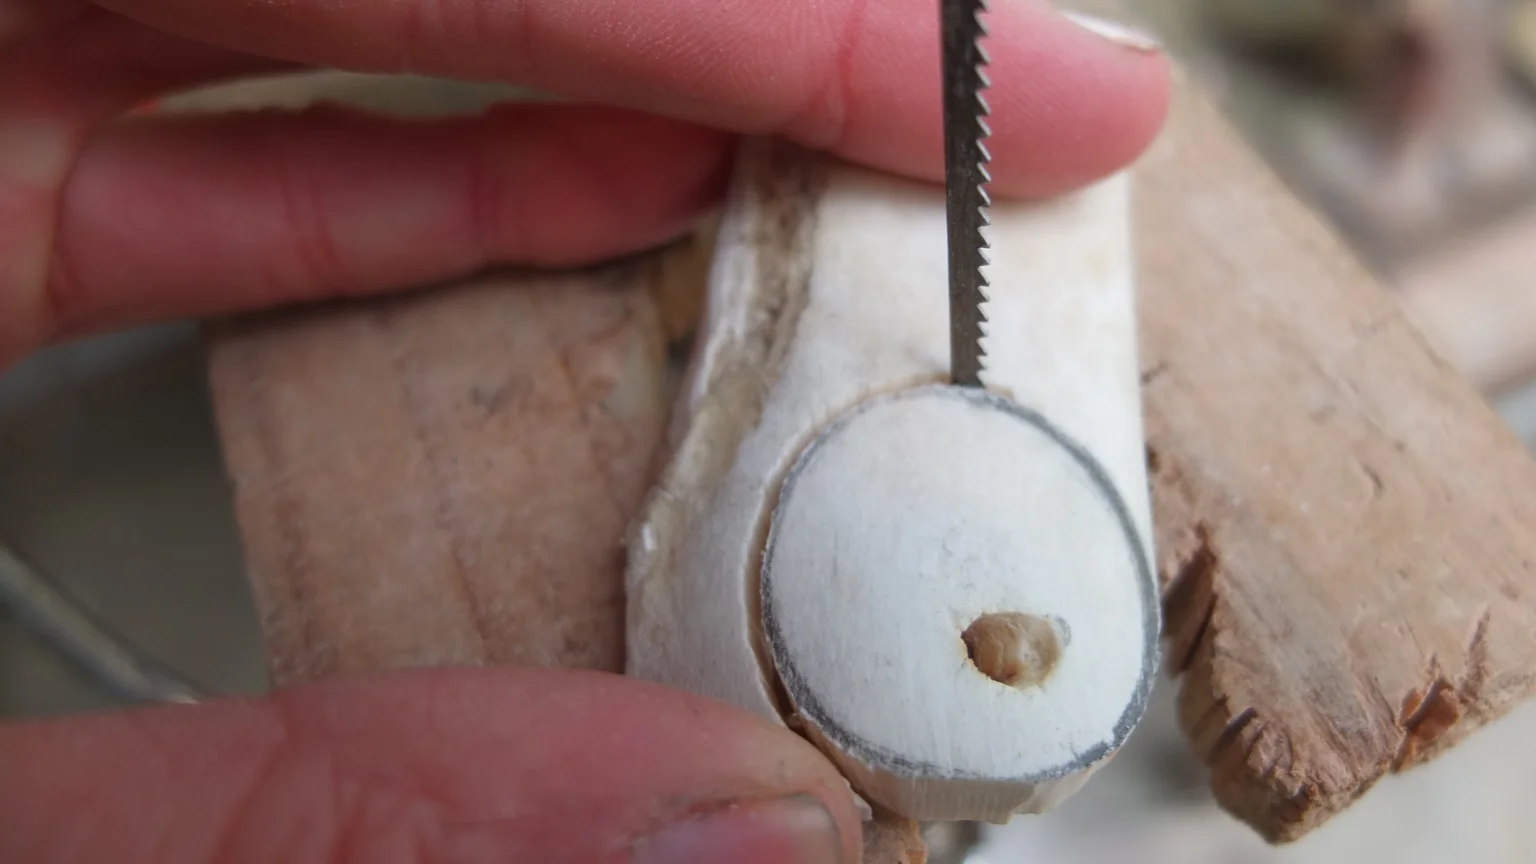
Step 02: Draw the design (a circle in my case).
Step 03: Scrib the hole before drilling
Step 04: Drill the hole.
stack option: image
is full width: false
video link:
dialogue repeater: false
caption:
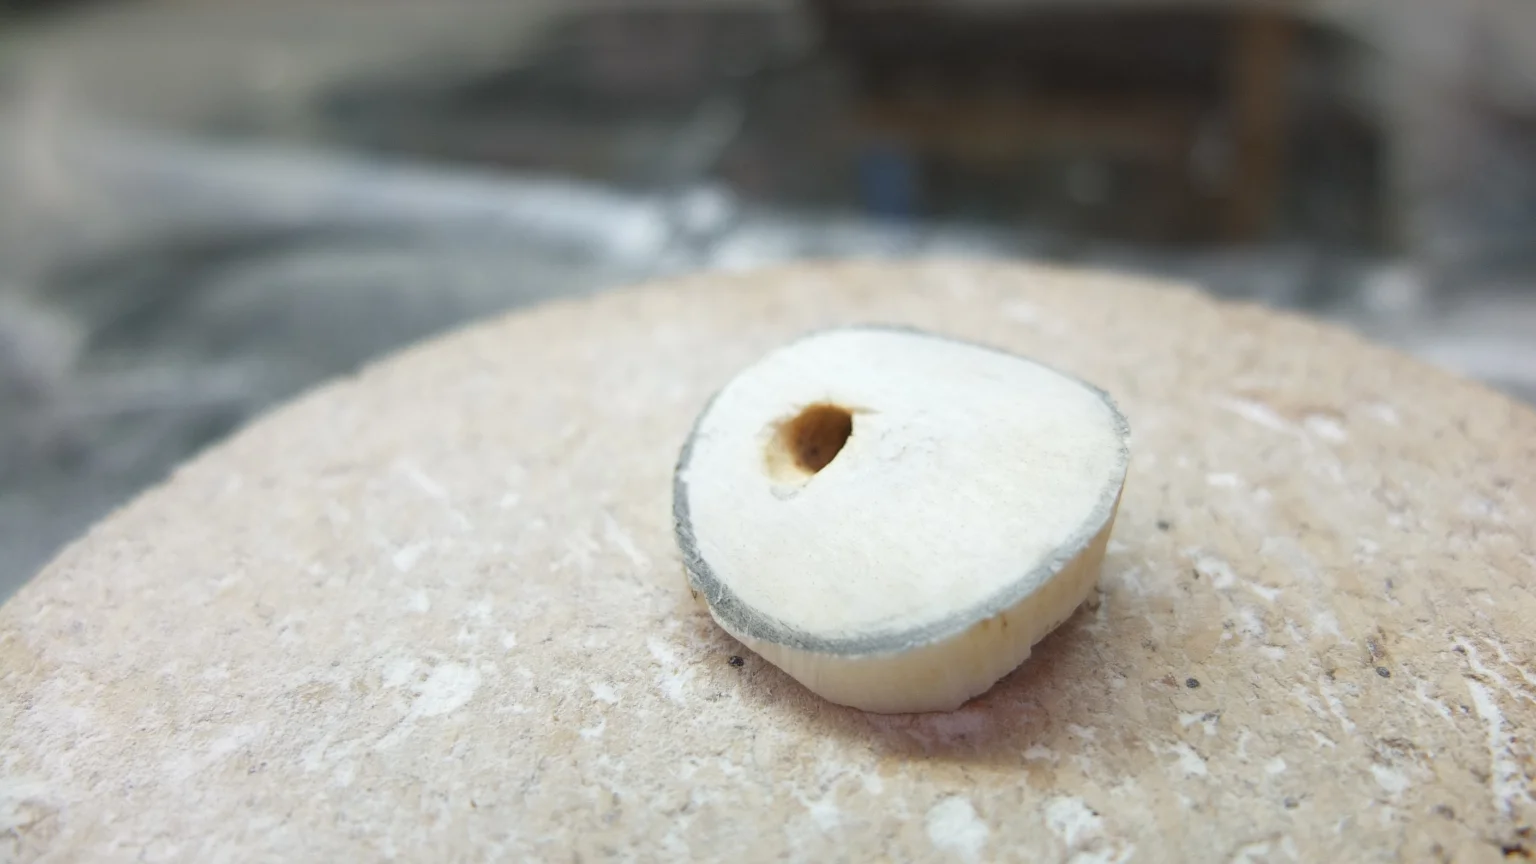
Step 05: Cut roughly the shape with a saw, by hand.
stack option: image
is full width: false
video link:
dialogue repeater: false
caption:
My piece is ready for drilling :-).
stack option: image
is full width: false
video link:
dialogue repeater: false
caption:
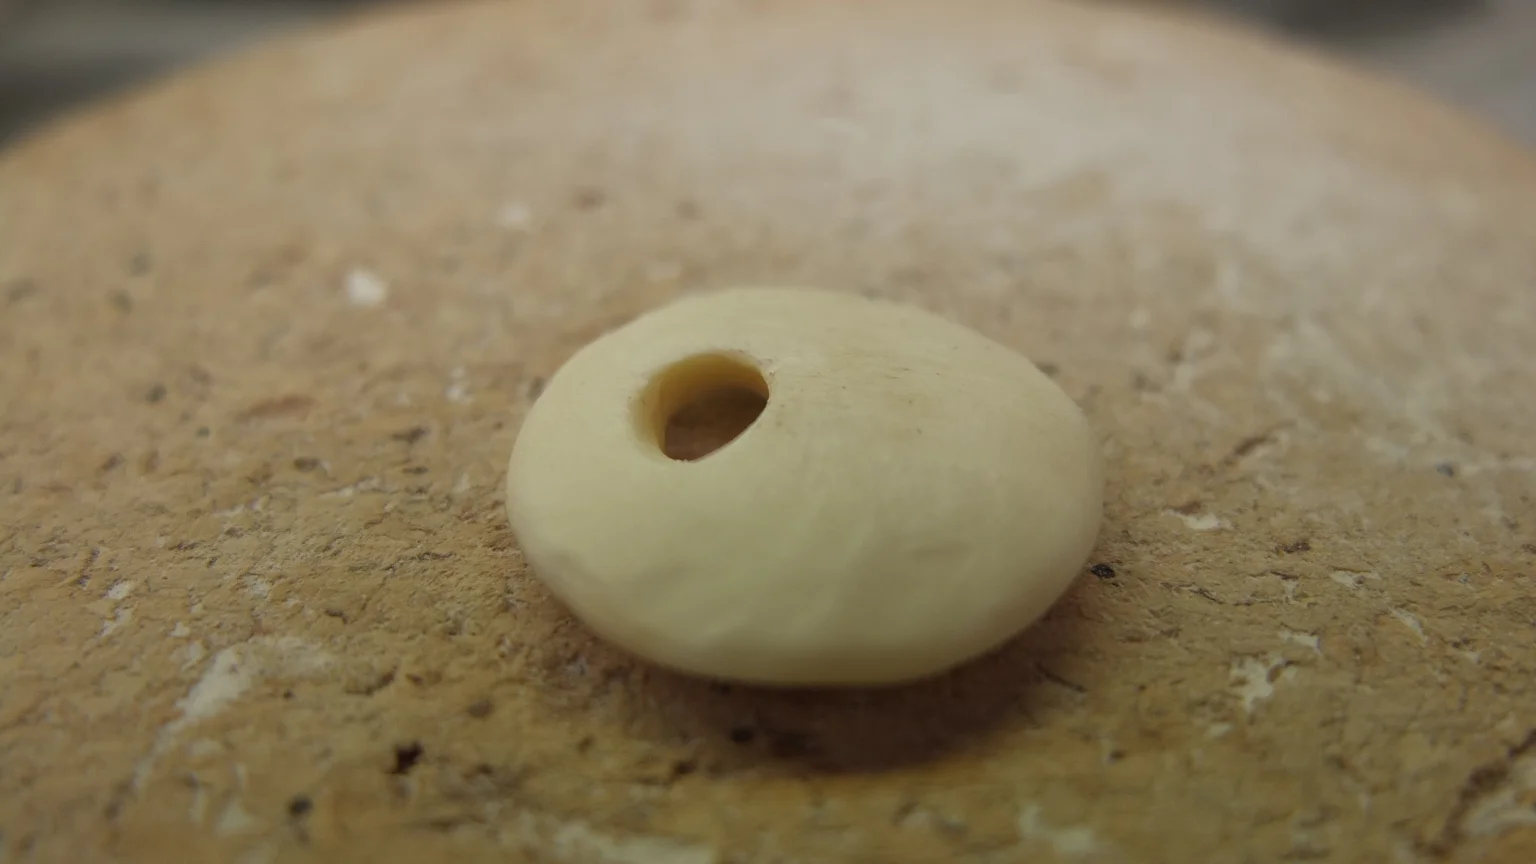
Step 06: Remove outer waste material.
Step 07: Use the Dremal machine to create a rough design
That’s it :-). The main shape is almost finished. Now I’m going to use sand paper to smooth the surface.
stack option: image
is full width: false
video link:
dialogue repeater: false
caption:
Step 08: Sand progressively the shape from 80 to 100-160 to 260 to 500.
It starts to look very good now :-) Compare to the beginning piece of bone, the difference is huge!
stack option: image
is full width: false
video link:
dialogue repeater: false
caption:
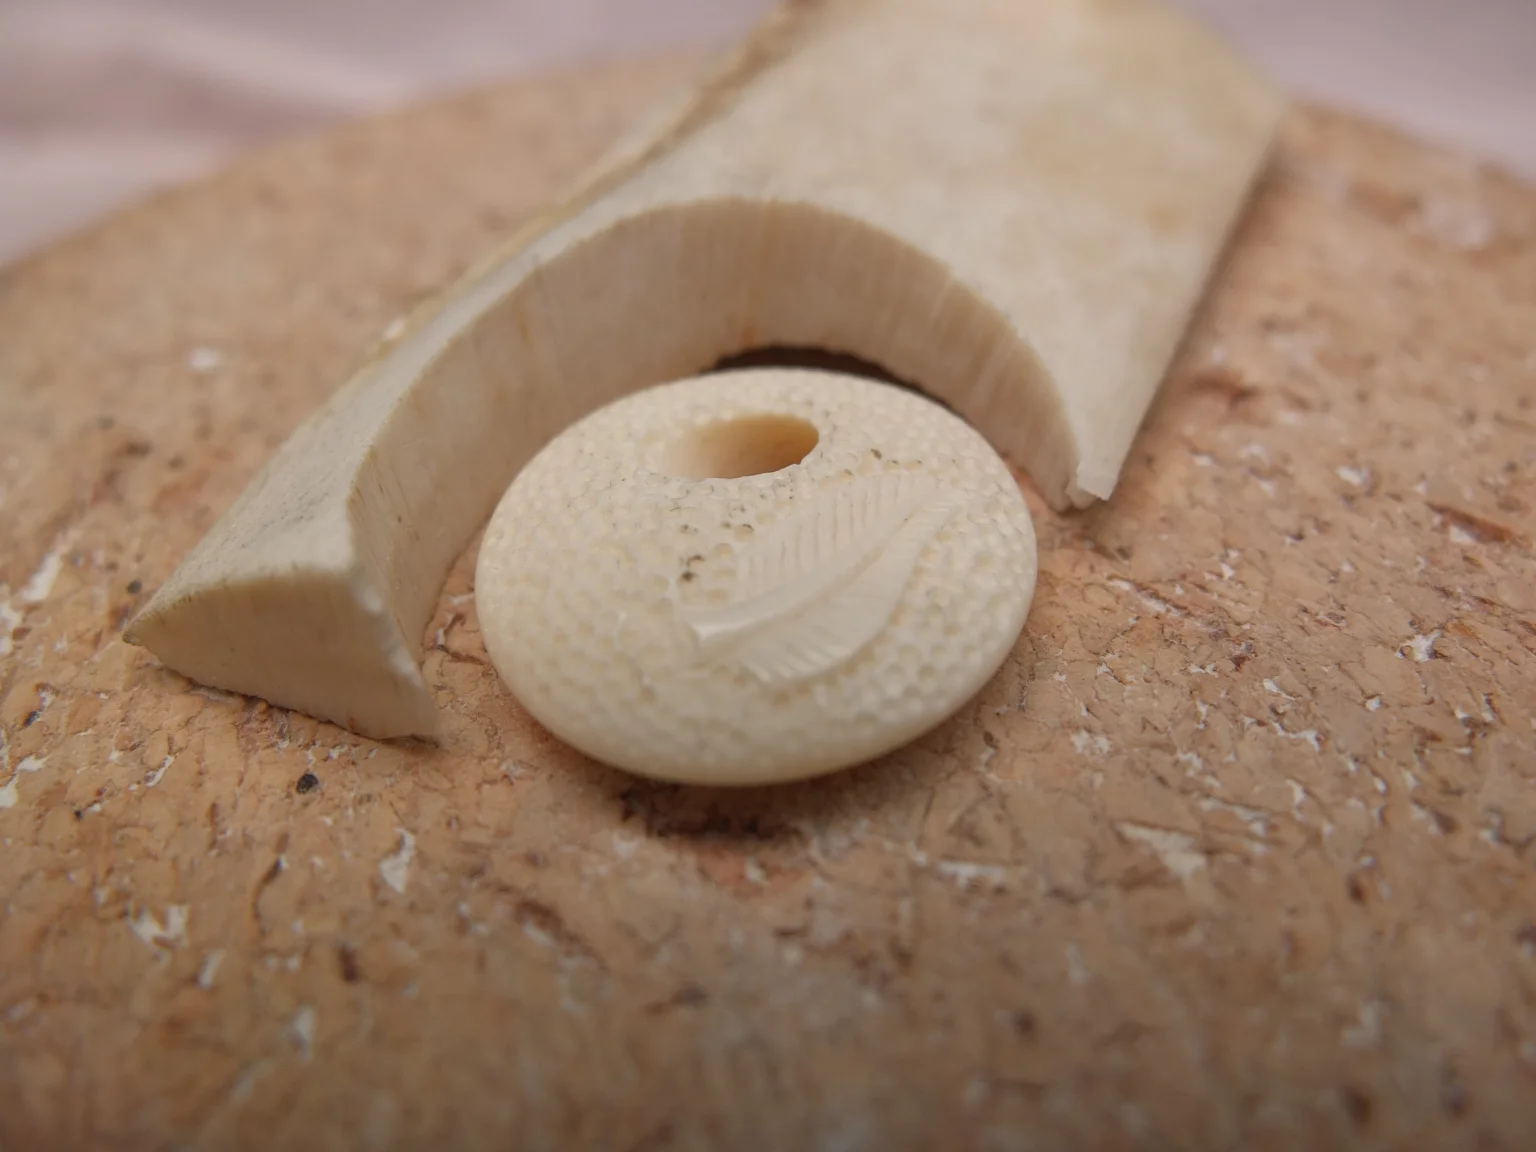
I planed to have a shiny side and a rough side.
Step 09: John used his Dremal to had details on the back side. He also added his signature, the famous New Zealand leaf :-)
stack option: image
is full width: false
video link:
dialogue repeater: false
caption:
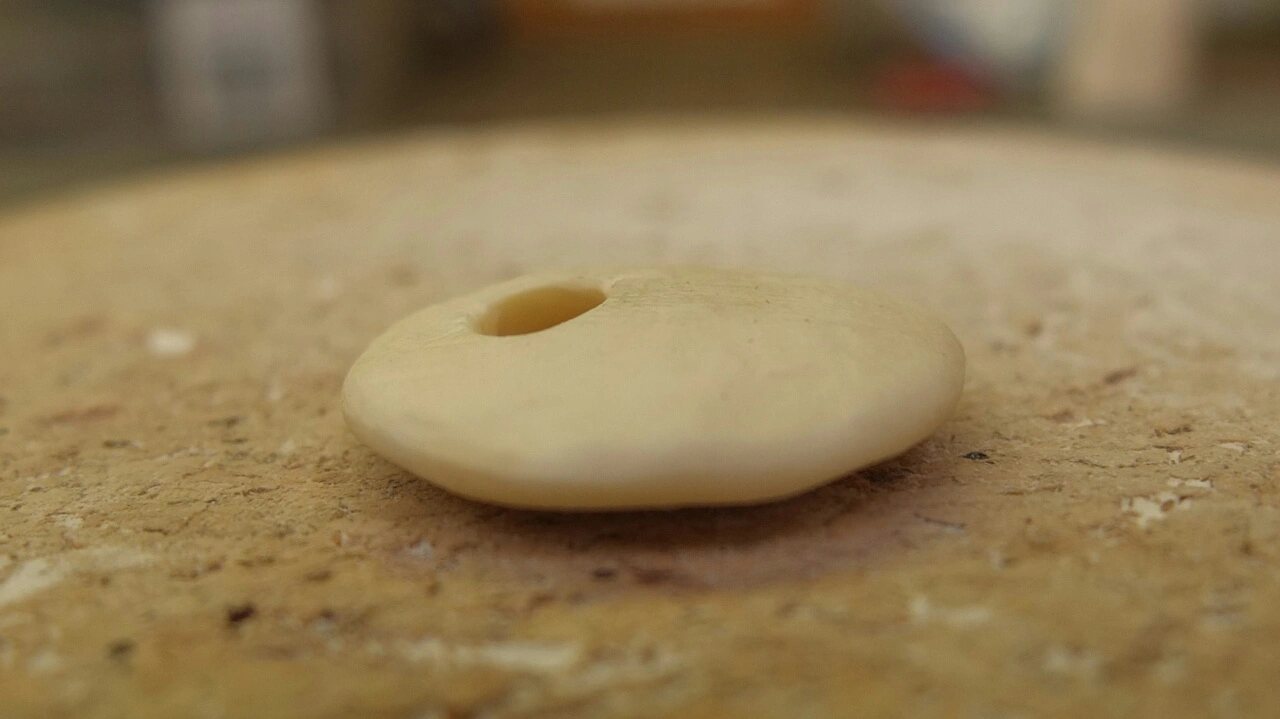
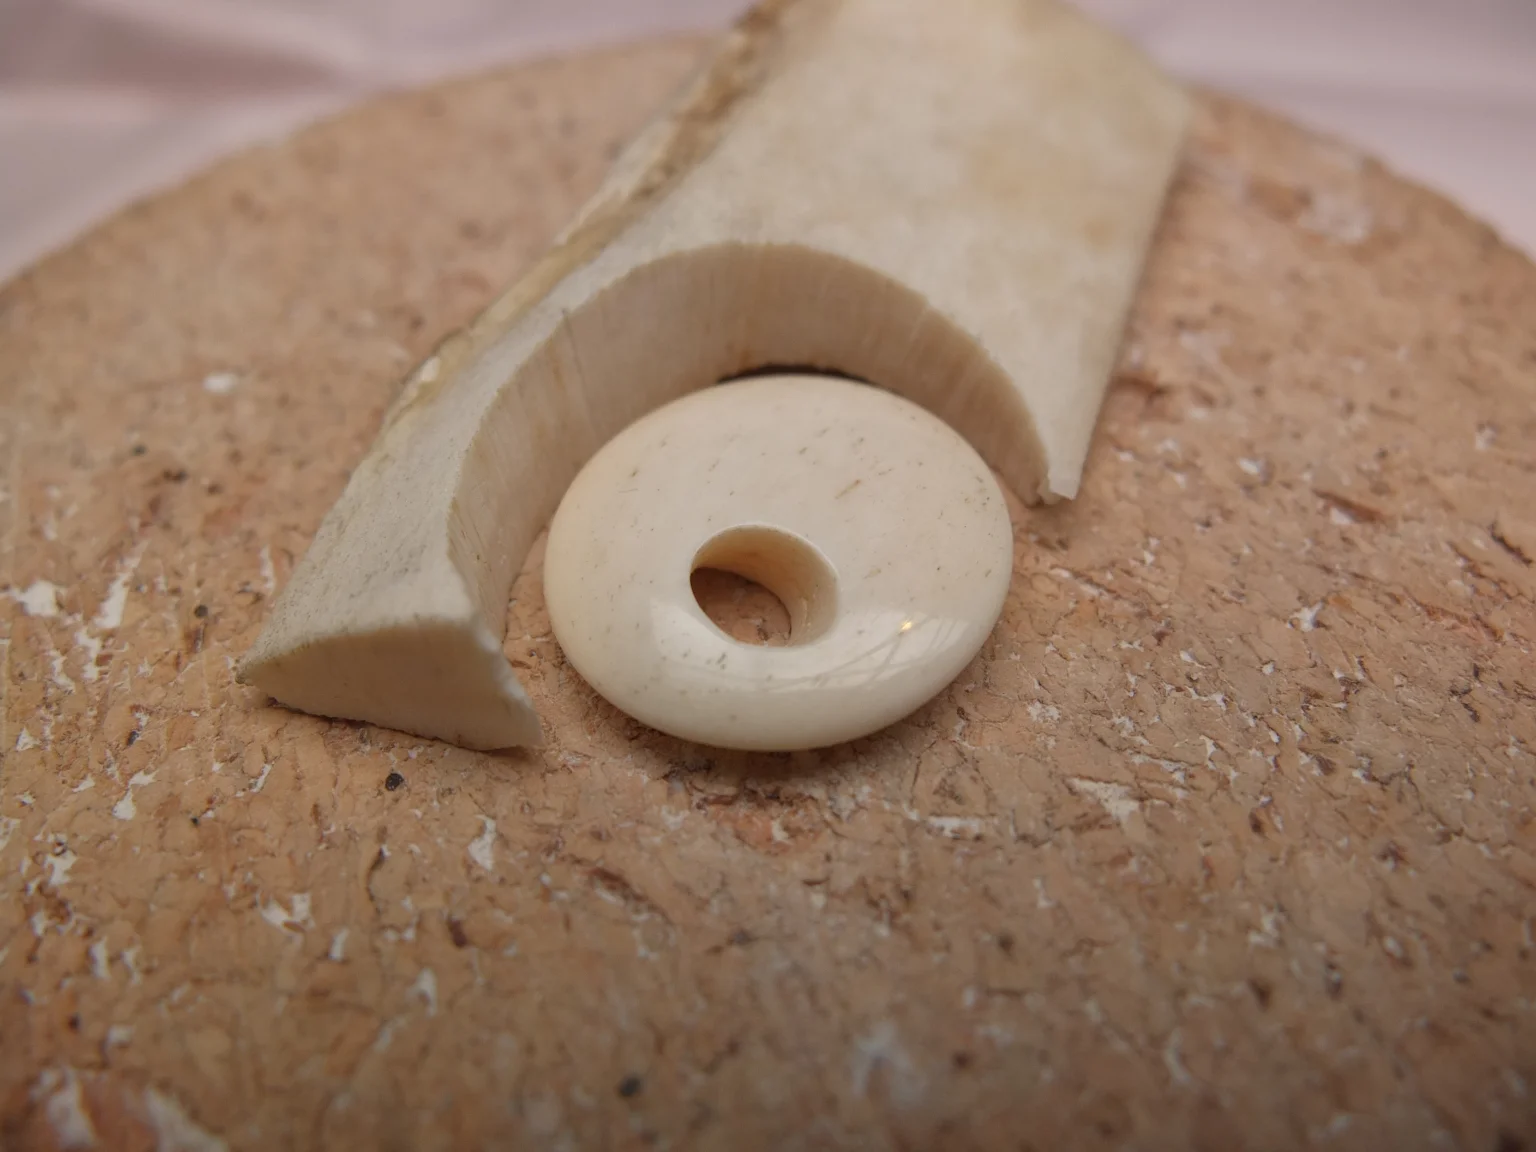
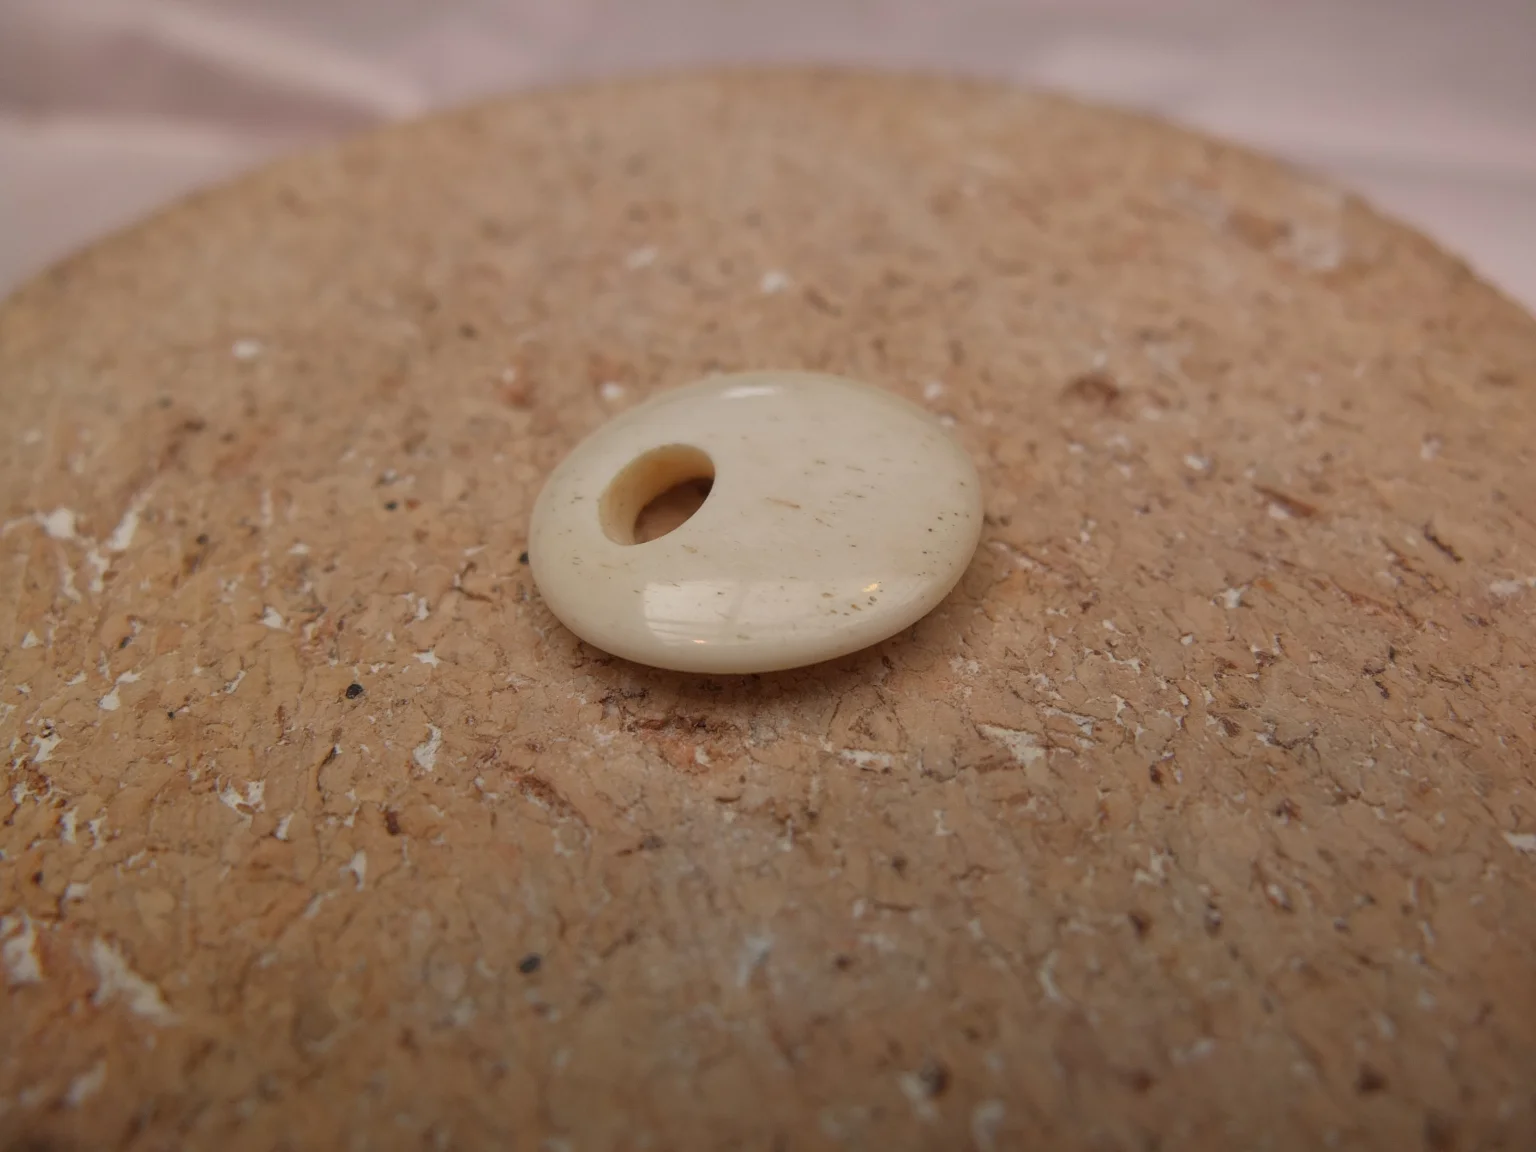
Step 10: Hand polish the final shape.
Step 11: Add the neck cord which I will do once I find the right one.
Learning and creating my own bone took 5 hours. Thank you John for your patience and kindness. That was a great experience. I’ll remember this day :-)
stack option: separator
is full width: false
separator: food
video link:
dialogue repeater: false
caption:
stack option: image
is full width: false
video link:
dialogue repeater: false
caption:
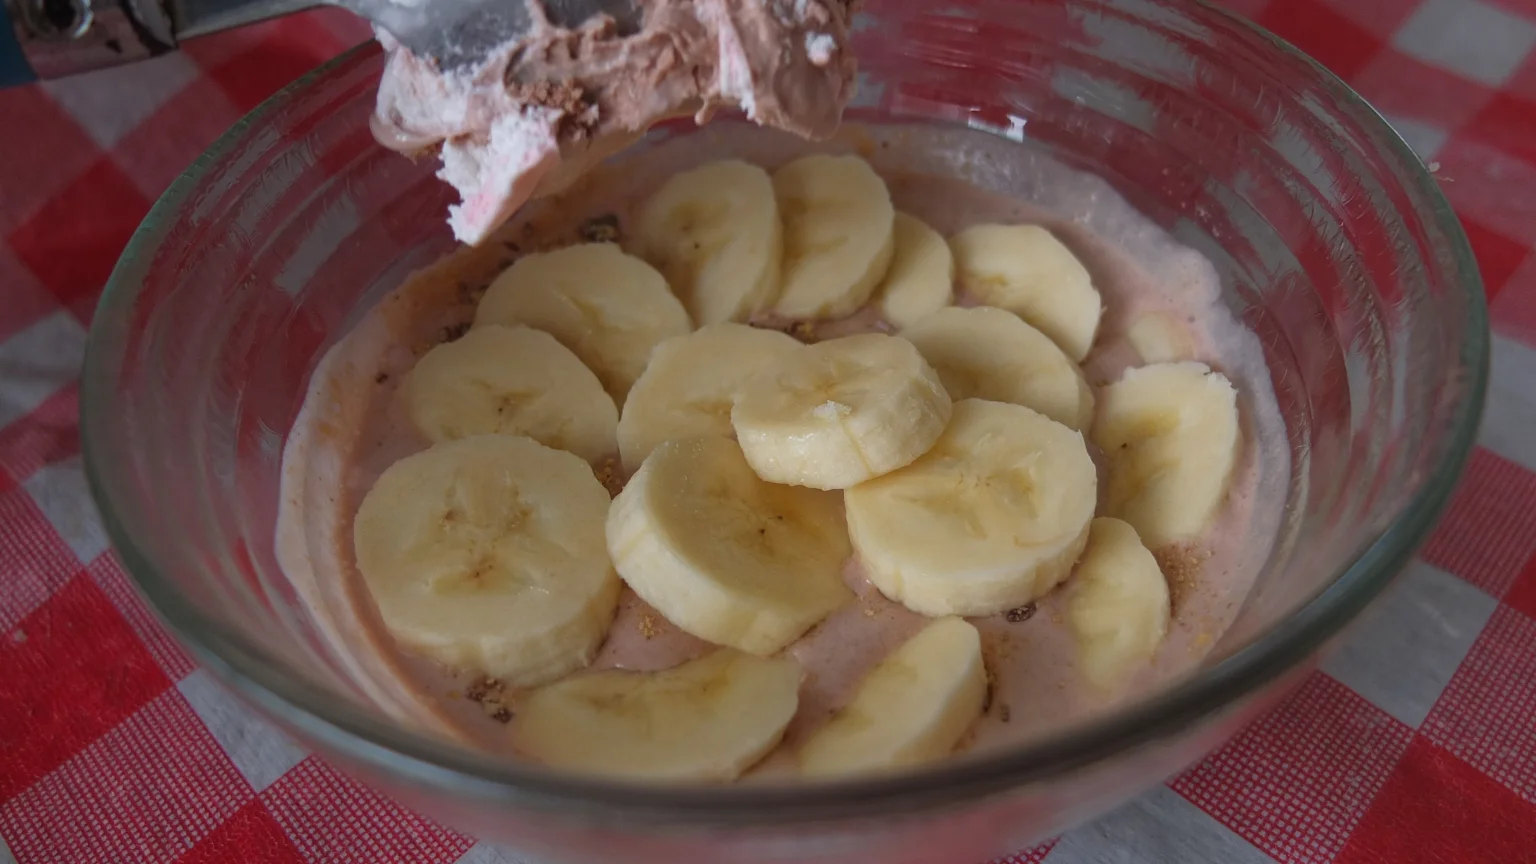
We got hungry and after a good lunch, Caila prepared some ice cream with bananas for dessert.
stack option: image
is full width: false
video link:
dialogue repeater: false
caption:
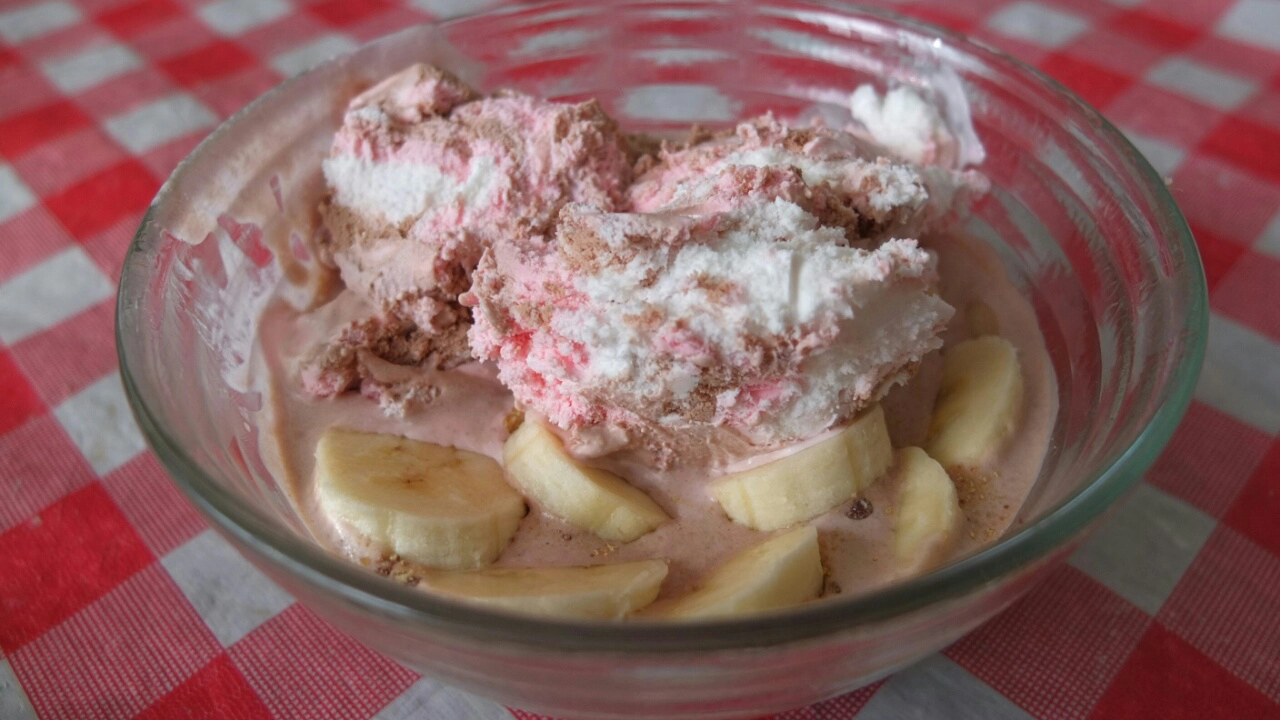
Ah, and of course, with more ice cream it’s better :-)